How to add Lemonsqueezy payments in your Nextjs project with examples
2023-09-21
This tutorial goes through how to add Lemonsqueezy payments in your Nextjs project.
This tutorial goes through how to add Lemonsqueezy payments in your Nextjs project.
You have two options: navigate the user outside of your website and into Lemonsqueezy's checkout page or use the overlay checkout while in your website. There are examples of how to do both below.
How to add payments by navigating the user to Lemonsqueezy's checkout page
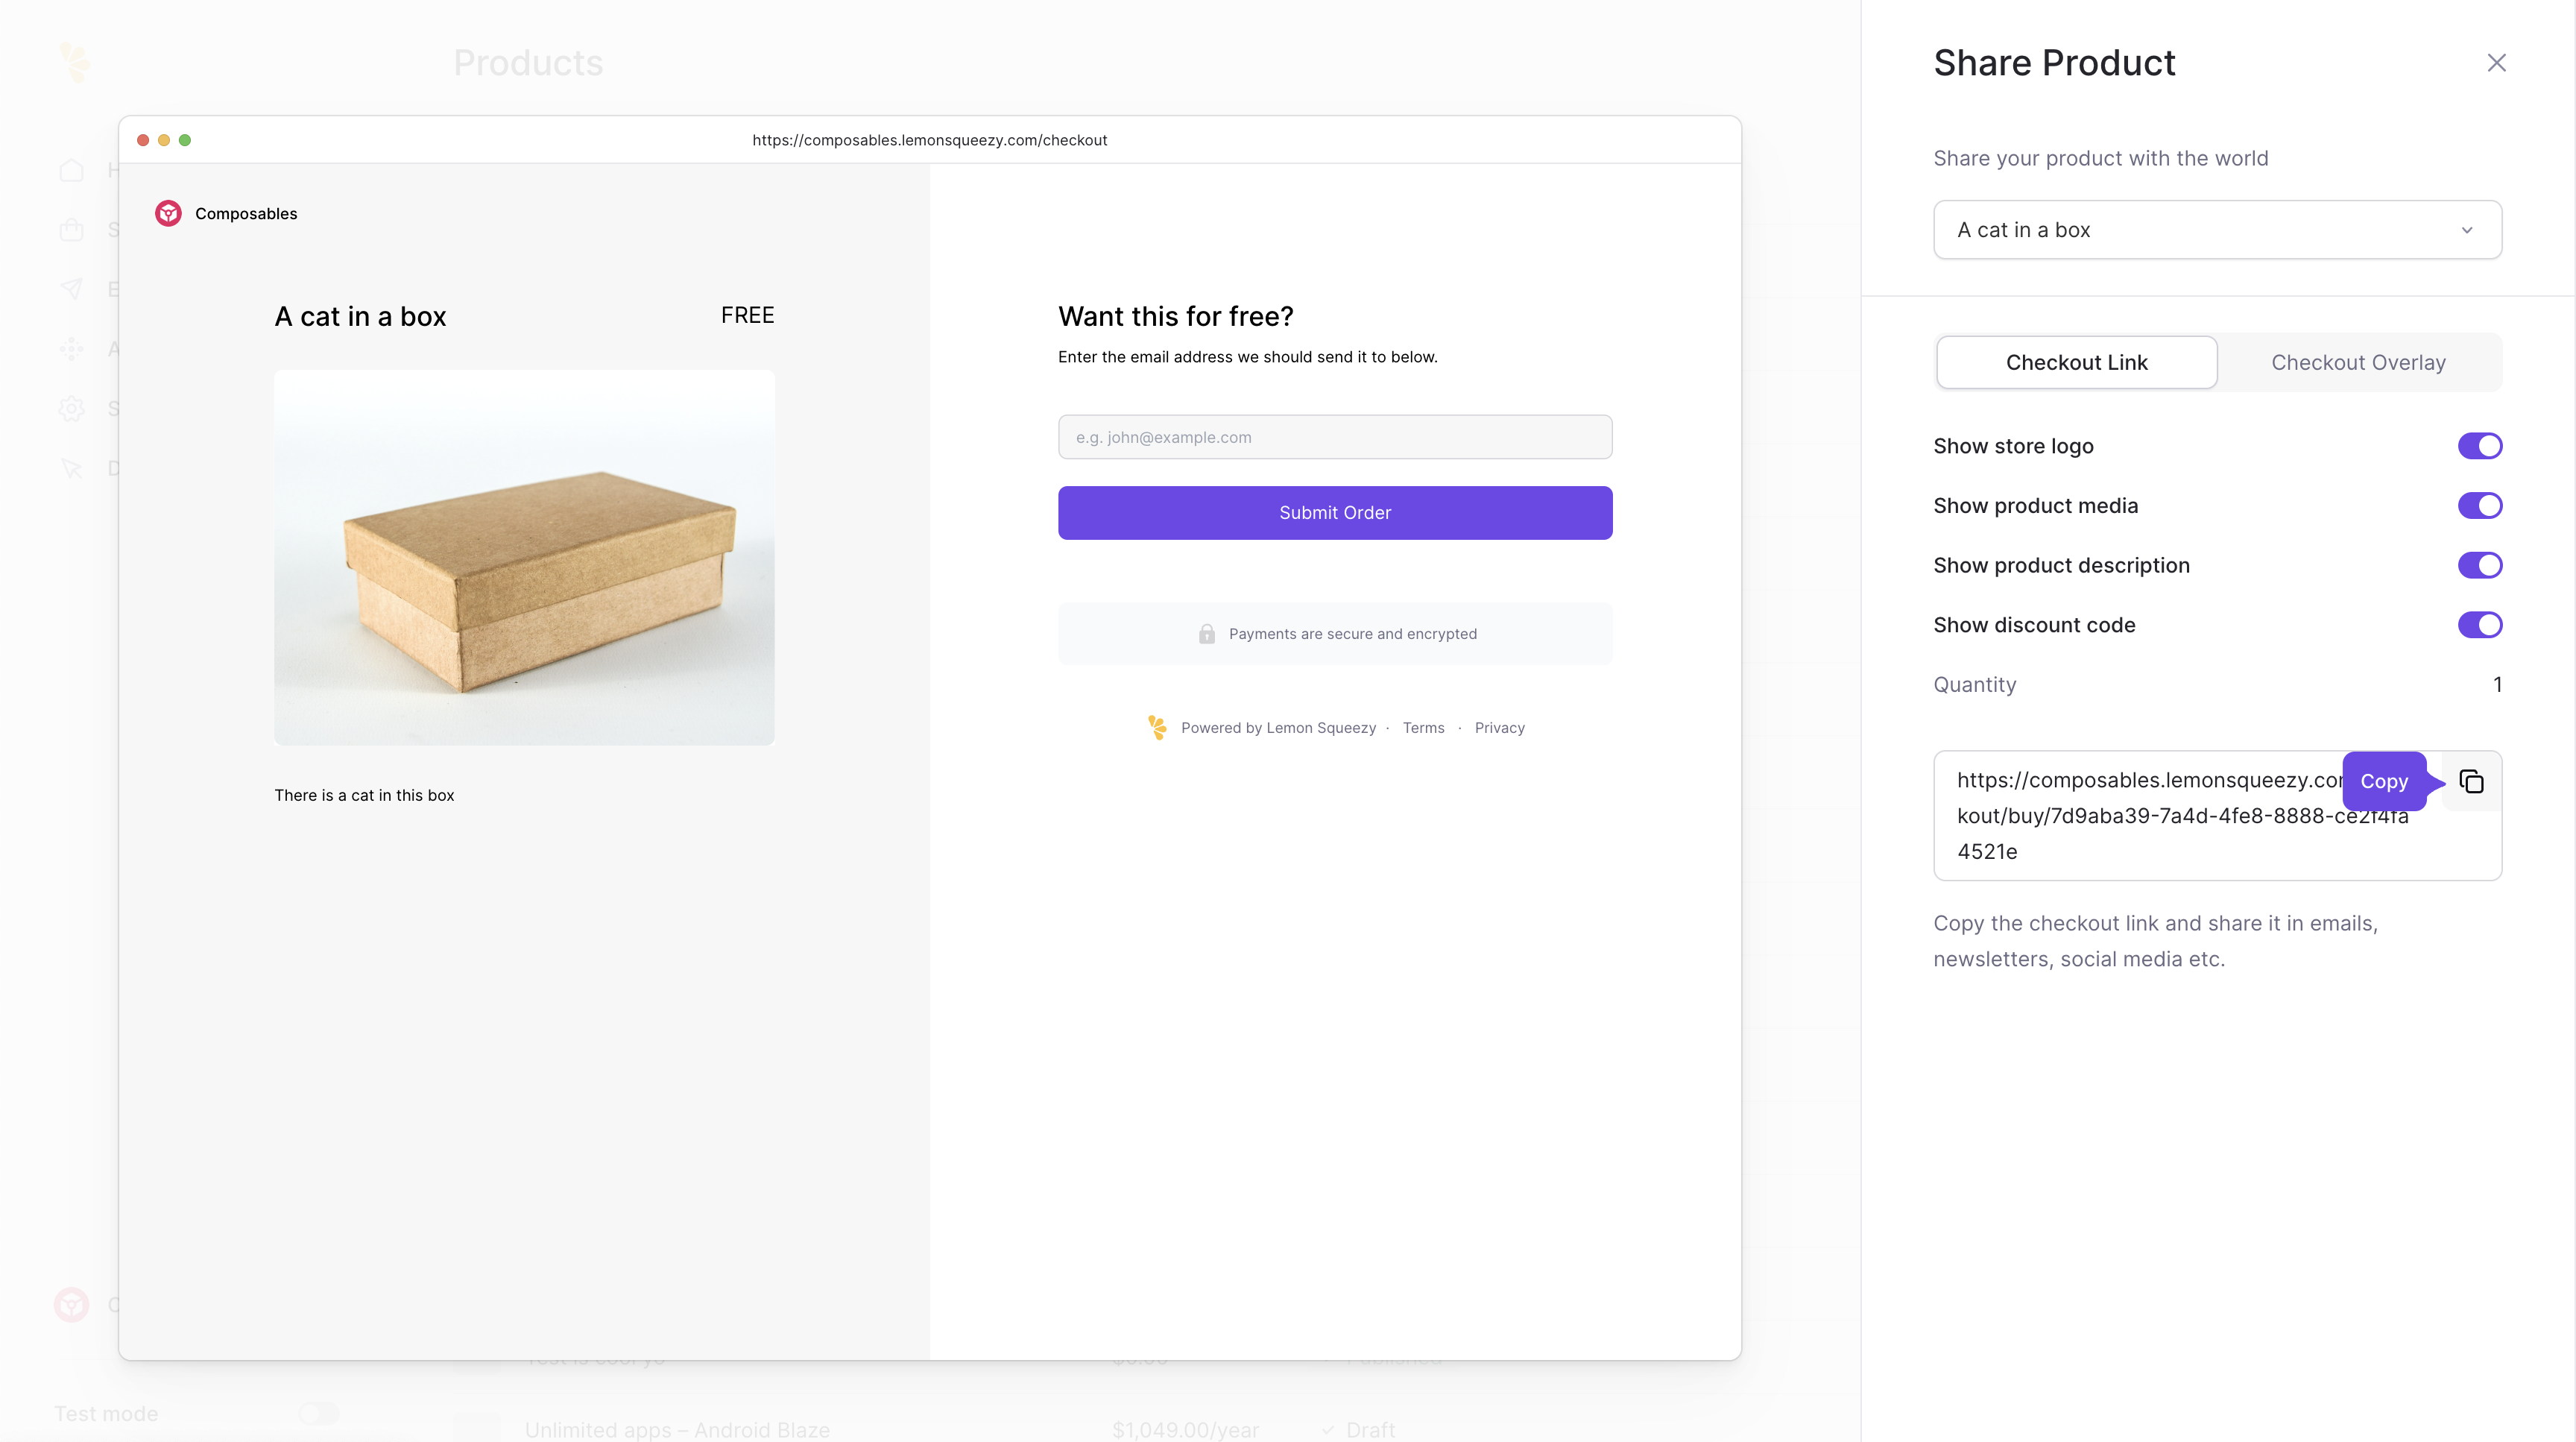
You first need to create a product via Lemonsqueezy's Dashboard. This part is straightforward and I won't go through it.
After you create the product, click on the Copy button to add the product's URL to your clipboard:
Then it is a matter of creating a Link to that URL:
import Link from 'next/link'

function LemonSqueezyPayments() {
  // replace the URL with your own product's URL
  return (
    <Link href="https://composables.lemonsqueezy.com/checkout/buy/7d9aba39-7a4d-4fe8-8888-ce2f4fa4521e">
      <button className="bg-black">Get your Cat-In-A-Box</button>
    </Link>
  )
}
which will result in a button like this:
How add payments by displaying the Lemonsqueezy Overlay
To display the overlay in your own website, you need to install the lemon.js script.
There is nothing to install via NPM or yarn. Instead, add this component to your layout:
function LemonSqueezyPayments() {
  return <Script src="https://app.lemonsqueezy.com/js/lemon.js" strategy={'lazyOnload'} />
}
it doesn't matter where you will add this in your layout. Anywhere will do.
Once you have added the script, you can display the overlay whenever it makes sense in your UX flow.
Say you want to display the overlay when a user presses a button in your Pricing section of your site.
<button
  onClick={() => {
    const url =
      'https://composables.lemonsqueezy.com/checkout/buy/7d9aba39-7a4d-4fe8-8888-ce2f4fa4521e?embed=1'
    LemonSqueezy.Url.Open(url)
  }}
>
  Get your Cat In A Box
</button>
which will display this button. Click on the button to see how the overlay looks like:
<button onClick={() => { const url = 'https://composables.lemonsqueezy.com/checkout/buy/7d9aba39-7a4d-4fe8-8888-ce2f4fa4521e?embed=1' LemonSqueezy.Url.Open(url) }} className="bg-primary-500 text-white px-4 py-2 rounded-full"
Get your Cat In A Box